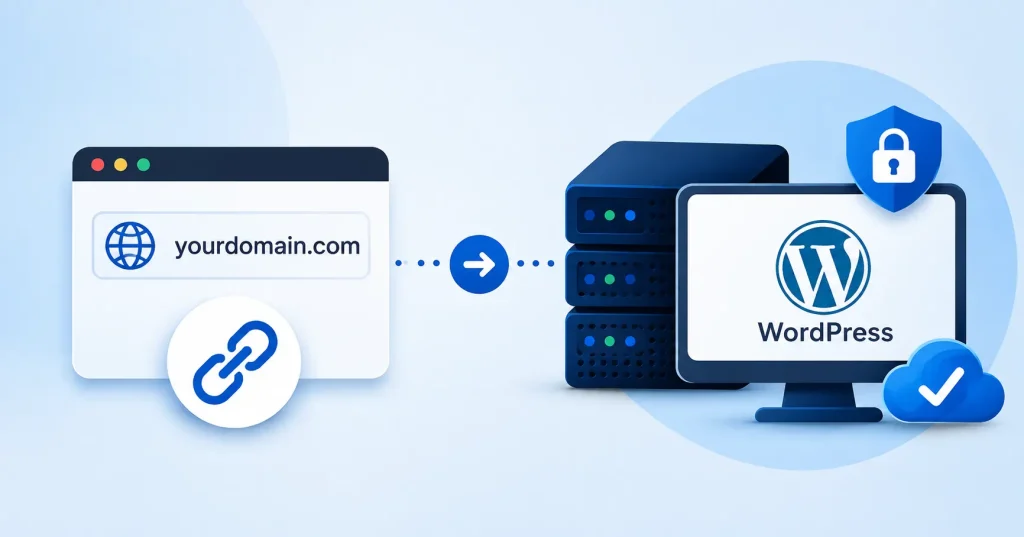

Building a site? You’ll need to link your domain to your WordPress hosting right out of the gate. It is a big deal. Buy the domain somewhere and host elsewhere, they won’t just magically talk to each other on their own. You have to bridge that gap yourself.People visiting your site would just hit a wall, you’ve got to connect them, and that happens through your domain’s DNS settings.
The upside? Alright, no fancy tech talk. Once those domains, the hosting, nameservers, and DNS records all just click, the whole thing feels surprisingly straightforward. We’ll map out how to link your domain to WordPress hosting, tackling both nameserver and DNS routes. A few little hiccups, Yeah, those are coming. We’ll face ’em.
Domain vs. WordPress Hosting: What’s the Difference?
Okay, so here’s the deal: your domain? That’s just the web address people punch in to find you. Simple. Hosting, that is your digital dirt. It is the actual plot where your WordPress files, the database, every theme, and every single plugin live. Everything sits right there.
Consider it this way. A domain is simply your house number, the exact spot folks head to when they drop off a single letter.Your hosting account? That’s the house itself, the honesttogoodness physical structure where your website actually lives.
Let’s say, for argument’s sake, you snagged example. com from one outfit, a domain registrar, but then sorted your WordPress hosting through a totally different company. Your hosting plan might even have WordPress ready. Here is the kicker. Visitors type your domain and see absolutely nothing on the screen. It is frustrating. Not until those crucial DNS settings actually direct that domain to the proper server, of course.
How to Connect Domain to WordPress Hosting
Two clear methods let you connect a domain directly.
- Change the domain’s nameservers to those provided by your hosting company.
- Just stick with your current nameservers. You’ll need to manually adjust the records, Usually, that’s an A entry. Sometimes, a CNAME.
Beginners should swap nameservers. It is simpler, Your host manages DNS behind the scenes effortlessly. However, if custom setups, mail services, or other delicate tech are already in play, watch out. That heavy approach demands far more care.
Step 1: Find Your Hosting Nameservers
Log in to your WordPress hosting account and look for a section such as Domains, DNS, Domain Management, Account Information, or Nameservers.
Your host should provide nameservers that look similar to:
- ns1.examplehost.com
- ns2.examplehost.com
The exact nameservers vary by hosting company, so don’t copy values from another website or tutorial. Use the ones provided inside your own hosting account.
Domain and hosting live apart? Easy fix, Just tweak your domain name servers to point straight at your host. WordPress docs say bridging them works.
Step 2: Log In to Your Domain Registrar
First, pinpoint where you actually bought your domain. This place is often separate from your website host, you know. Find the exact domain name you want. Next up, open its DNS or nameserver settings, the wording shifts depending on where you are. Look for labels like Manage DNS, DNS Settings, or Nameservers. Don’t move the domain itself. It’s fine to leave it registered with one provider while your actual site lives somewhere entirely different.
Step 3: Replace the Existing Nameservers
Going with the nameserver method, you’ll need to pick the custom nameservers option.
Delete the old nameservers, then type in the ones your WordPress host gave you. Don’t forget to save.
Now, be really careful here. Is that domain already handling emails? If so, swapping nameservers could mess with your other DNS records, especially if the new DNS zone doesn’t have the right mail settings. So, if you’ve got a custom email like hello@example. com, check your MX records and your email provider before you make any changes.
Step 4: Add the Domain Inside Your Hosting Account
Honestly, just messing with your DNS rarely cuts it. Your hosting account itself demands precise orders about which domain gets to parade your WordPress installation.
So, navigate to that hosting dashboard. You’ll need to graft your domain there, probably within a domain management section. Providers get inventive with the labels: “Add Domain,” “Connect Domain,” “Addon Domain,” or sometimes, “Primary Domain.” What a mouthful.
If WordPress is already chugging, doublecheck it’s correctly tethered to the right domain. This is paramount, especially when juggling several sites on one account. Simply pointing DNS to the server doesn’t instruct it on what content to retrieve for each domain.
Step 5: Check Your WordPress URL
After the domain is connected, log in to WordPress and check Settings → General.
The WordPress Address (URL) and Site Address (URL) should normally use your intended domain, such as:
https://example.com
If the site still uses a temporary hosting URL, update it carefully. Changing WordPress URLs incorrectly can cause login or redirect problems, so make sure your domain is already configured correctly before making major URL changes.
Step 6: Enable HTTPS
Your site should use HTTPS rather than plain HTTP. Most modern WordPress hosting providers offer SSL certificates through their hosting platform.
After the certificate is active, test both:
https://example.com
and
https://www.example.com
Verify HTTP requests force an HTTPS redirect once configured. If secure connections misbehave immediately, do not panic or blame WordPress. The SSL certificate might still be provisioning behind the scenes, or your domain simply needs a minute to fully resolve. Patience helps.
How to Connect a Domain Using DNS Records Instead
Changing nameservers isn’t the only option. You can keep your existing DNS provider and point specific records toward your WordPress host.
Your hosting company may provide an IP address for an A record and a target for a CNAME record. An A record typically points the root domain to the server’s IP address, while a CNAME can be used for a hostname such as www.
A typical setup might look like:
- A record: @ → hosting IP address
- CNAME: www → @ or the hostname supplied by your host
Your hosting provider dictates the exact records you need. Follow their guide instead of assuming all WordPress servers use identical configurations.
This approach works well when third party DNS, email setups, security tools, or active subdomains are already tied to your domain and you prefer leaving them untouched.
How Long Does Domain Connection Take?
DNS changes aren’t always visible immediately. After you update nameservers or DNS records, different DNS resolvers may continue using older information until their cached records expire.
Some changes appear relatively quickly, while others can take considerably longer. WordPress’s Learn platform notes that DNS propagation can range from a couple of hours to as much as 72 hours depending on the change and DNS environment.
Your site might load fine on your phone while throwing errors somewhere else. Or maybe it just shows a parking page, Don’t panic. That usually just means DNS is still updating across the globe, it is rarely a sign that the actual connection failed. Sit tight.
Common Problems When Connecting a Domain to WordPress
The domain still shows the old website
Your DNS records may still point to the previous hosting provider. Check the nameservers or A record at your registrar and compare them with the details provided by your new host.
The website shows “This site can’t be reached”
Check that the DNS records are correct and that the domain has been added to your hosting account. Also verify that the domain hasn’t expired or been placed on hold.
WordPress redirects to the wrong domain
This can happen when the WordPress Address or Site Address is still configured with an old URL. Check the WordPress URL settings and any redirect rules configured through your hosting account or plugins.
Your website works but email stopped working
This is one of the most important issues to watch for. If you changed nameservers, your new DNS zone needs the correct MX records for your email service. Otherwise, website DNS can work while incoming email fails.
HTTPS shows an SSL error
Make sure the domain resolves to the correct server first. Then check whether your hosting provider has issued an SSL certificate for the domain and its required hostnames.
Should You Change Nameservers or DNS Records?
Got a basic WordPress site, Nothing fancy with the DNS? Then nameservers are probably your easiest bet. Your hosting provider can just handle the whole DNS zone, that way, you don’t have to futz with individual website records yourself.
But if you gotta keep your DNS control somewhere else, or your domain’s already hooked up to important services, then go with the DNS record method instead.
Just do yourself a favor before you change anything: jot down all your current DNS records. That tiny bit of planning can save you a mountain of headaches later, especially if your domain’s managing things like business email, subdomains, verification records, or other outside services.
Spinning up a brand new site? Once WordPress is live, you’ll want to check out our guide on how to rank a new website on Google fast. It’s a solid next step.
FAQ’s
Can I connect a domain to WordPress without transferring it?
Keep your domain right where it is. Just point it toward your fresh WordPress host by tweaking nameservers or DNS records. Honestly, it is that simple.
Do I need to buy a domain and hosting from the same company?
Nope. You buy domain names and web hosting as two totally different things. Plenty of folks use separate companies, it doesn’t mess with WordPress at all.
Should I use nameservers or an A record?
Nameservers? Simple. But an A record setup lets you keep your current DNS provider, or whatever services you’re already using. More control, you know.
Will changing nameservers affect my email?
Definitely. If existing DNS settings run your email, doublecheck that the new setup mirrors every MX and vital record before you switch nameservers. Don’t skip that.
How long does it take for a domain to connect to WordPress hosting?
DNS caching and that precise tweak? It’s a gamechanger, truly. Certain updates fly. Others dawdle, so expect a wait, potentially up to three days, for the full rollout.
What should I do if my domain still isn’t working after 72 hours?
Doublecheck those nameservers against the exact numbers your host handed you. Confirm the domain actually sits inside your dashboard right. Still stuck? Reach out to support so they can dig deeper into your account.
Conclusion
Linking a domain to your WordPress host isn’t rocket science. It’s basically just telling the domain where to find its online spot. First thing’s first: figure out if your host wants nameservers or specific DNS records. Then, hop over to your domain registrar, wherever you bought that address, and punch in the details they need.
After the DNS bit is sorted, you’ll add the domain to your hosting account. Make sure your WordPress URL is exactly right and that HTTPS is turned on. If email comes with your domain, run a quick test. And don’t freak out if it doesn’t work right away. DNS changes take a while to ripple through the whole internet.
Seriously, the absolute best move is to use the exact DNS data your host gives you. Write down what you have now before you change anything, and only swap out one setting at a time. This way, if things go sideways, you’ll know exactly what caused it, pronto.